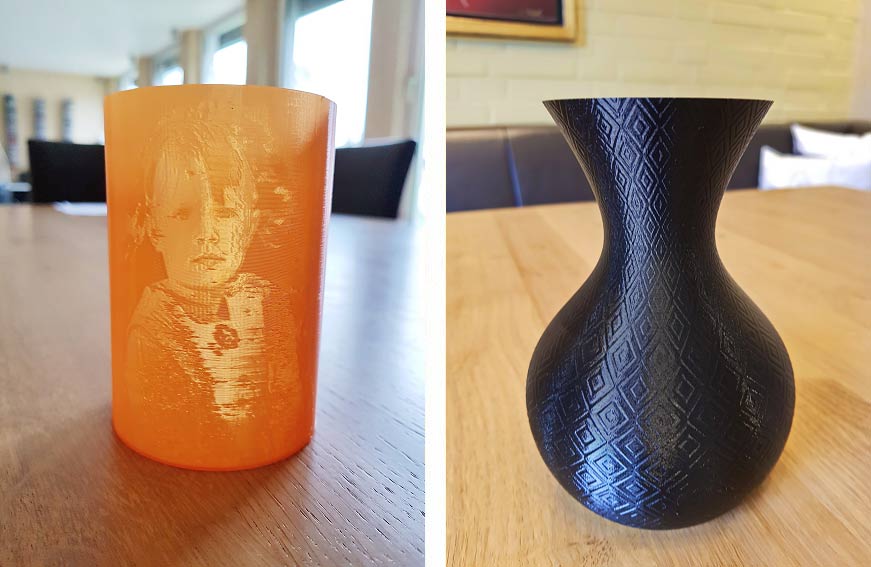
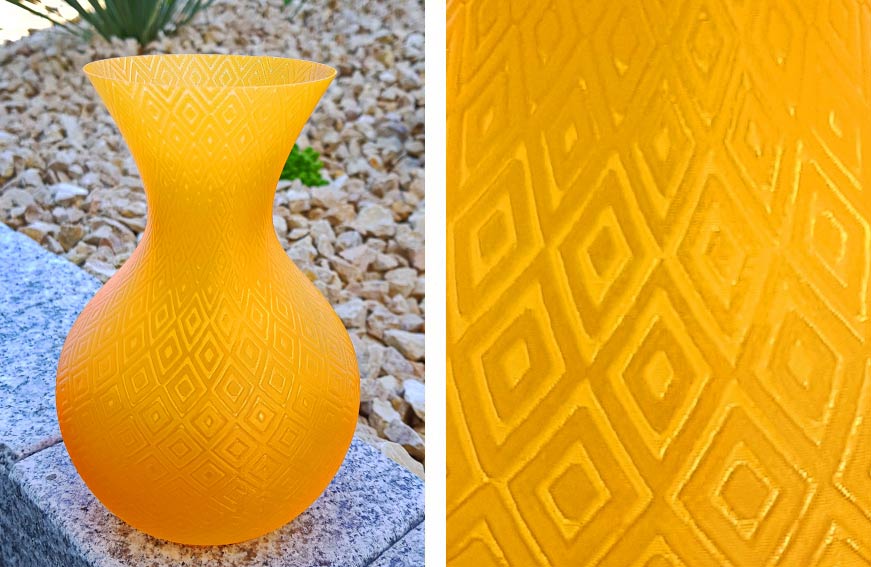
With Velocity Painting you can easily modify the look and feel oft your model surface. A high contrast images or a black-and-white image is projected onto the model. The bright areas are printed slower, the dark areas faster, which visibly changes the surface. Most extruders can not adapt to new speeds directly, so that speed changes change the thickness of the extruded filament for a while. When your speed increases, the extrusion gets thinner, while slower speeds makes the extrusion thicker. Velocity Painting uses this effect and increases it by selecting very different speeds to create the relief. This is particularly visible for translucent filaments, e.g. for vases, but also opaque filaments get a structured surface.

The Velocity Painting technique is developed by Mark Wheadon. Our Velocity Painting solution ist inspired by the application of Guillaume Vigneron.
And so it works
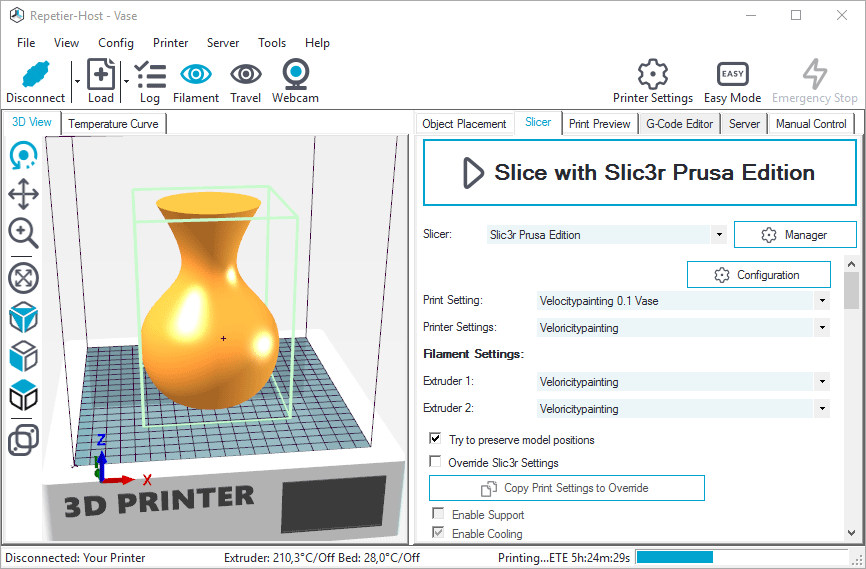
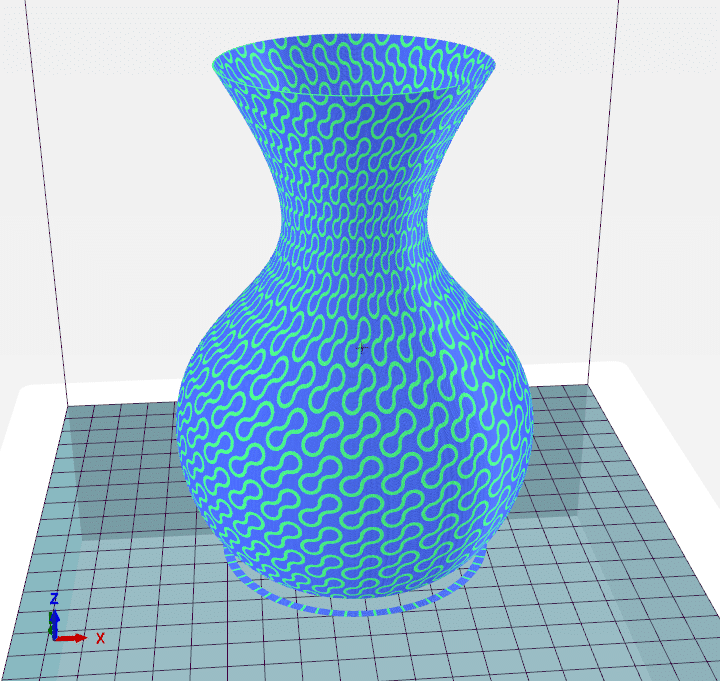
- Load your model and slice it with the correct slicer settings. Please check your printer settings. For Velocity Painting, a trigger speed will be replaced on the projected area. The perimeters of this vase are printed with 60 mm/s, so later I will set 60 mm/s as my trigger speed. If you set other speeds for infill, support or first layer, these speeds will not be changed. This model is printed as spiral vase.

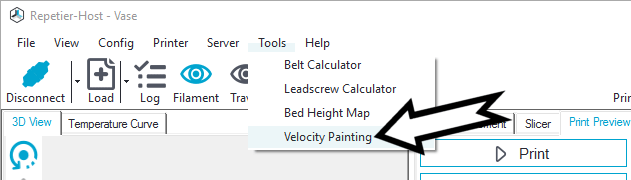
- After slicing, click Tools Velocity Painting.
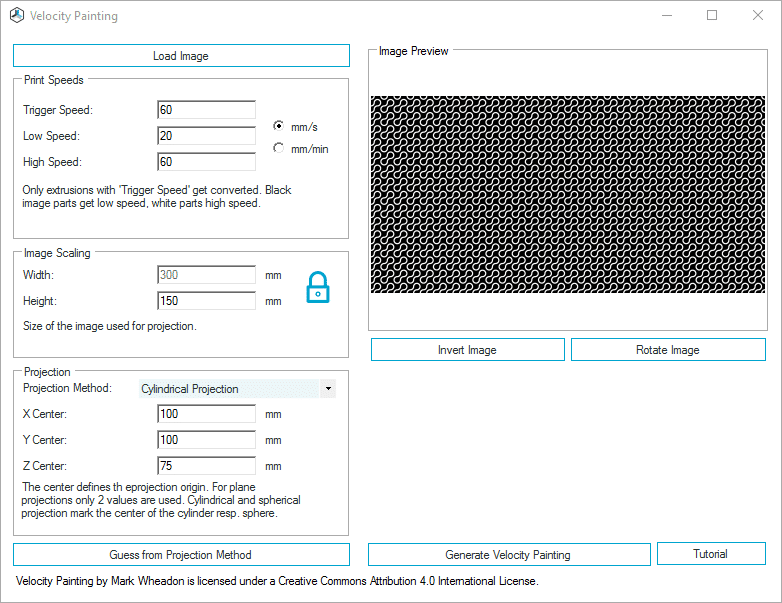
- Here you can enter all values. First you should load an image (.jpg, .png and .gif), that will be used for projection. You can invert or rotate the image. The larger the contrast, the stronger the effect. For patterns, use a black-and-white image.
Set your trigger speed, this will be replaced on projected areas with speeds between low and high speed for painting. The fast speed should be 3 times faster than the slow speed, if this is too much, do not go below 2/1. Then you should first select the projection method and click the button Guess from Projection Method. The suggested width and height and the center of the model will be set automatically and can be adjusted to zoom or move the image. If everything is correct, click Generate Velocity Painting.
- You will get a preview of you new G-Code. To visualize the pattern in the G-Code, the printing speed coloring is automatically selected.
If you want to make any changes in Velocity Painting, open Tools Velocity Painting again, the unedited G-Code is cached and will be used, so that you do not have to slice again. If you want to used the transformed G-Code to add another image, open the G-Code Editor and delete the first line
; Velocity painted versionand then open Tools Velocity Painting. But remember that only the trigger speed will be used for painting.
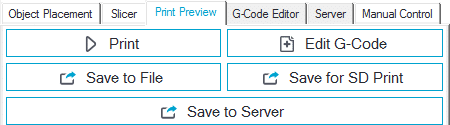
- If everything is perfect, you can start printing or save your painted G-Code.


If you want to try it out, you can download our Velocity Painting Starter Pack with vase model as stl file and some pattern images.
Some Hints
- Loaded images will be converted to greyscale. To improve the contrast, you might want to convert this in your image editor.
- Transparent filament give a higher contrast.
- The effect might get reduced if your firmware has activated advance algorithm, because the target of this algorithm is to avoid the effect we are using here.
Troubleshooting
After I click “Generate Velocity Painting” I see no structure in the preview.
There can be different reasons:
- The loaded image does not have enough contrast. The stronger the contrast, the stronger the effect. Black-and-white images or greyscale images with less than 10 clearly defined brightness levels work best.
- You set the wrong trigger speed. Only filament printed with the trigger speed will be modified.
- Low speed and fast speed are too close together. The ratio should be 1 : 3 to 1 : 2.
- The preview mode shows extruder and not speed.