Fill your print bed
Objective
Prepare all objects you want to print, so your printer can print them. Learn how to arrange them on your print bed. Rotate and scale them to your likes.
Workflow
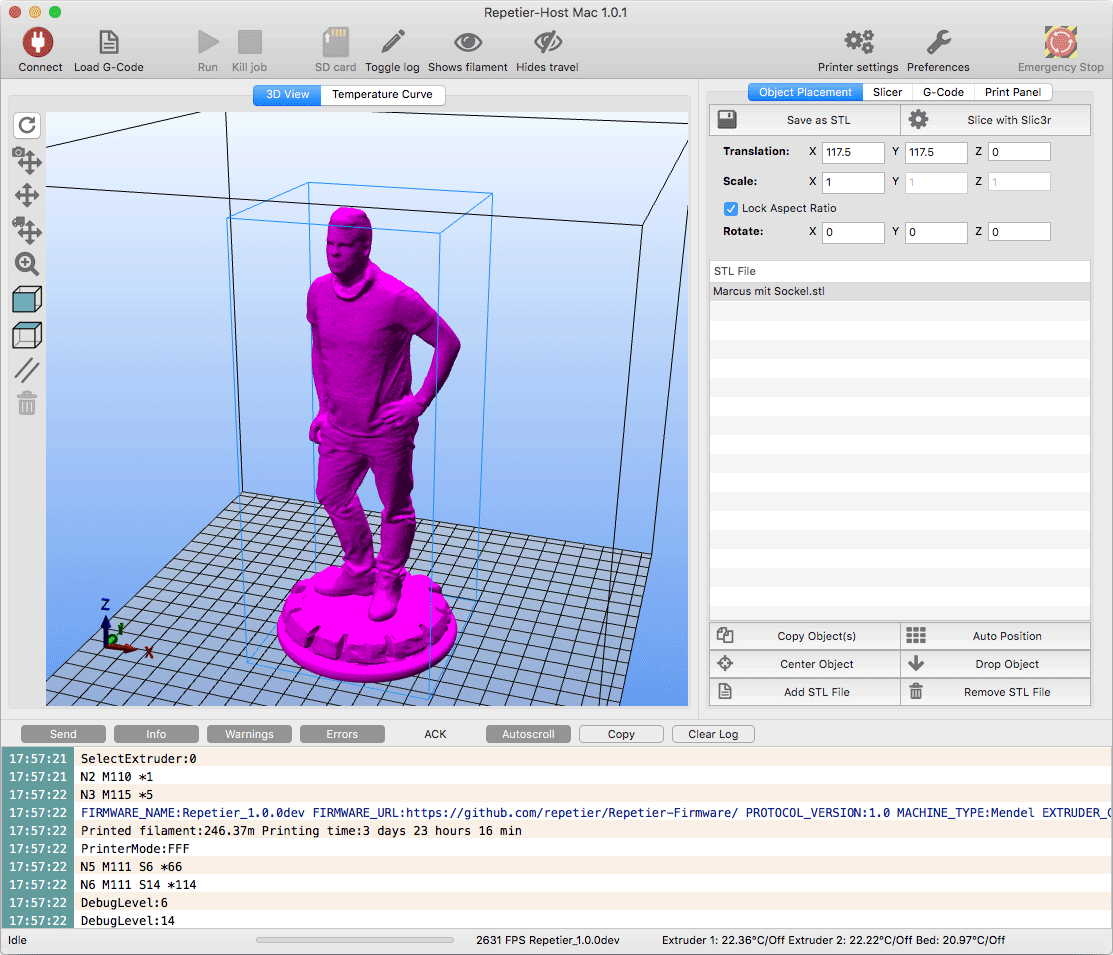
Open the “Object placements” tab. You will see the print area on the left side. You start with importing all STL files using the “Add STL file” button. You can select multiple STL files at once if you want. The host will always try to position the objects in a non overlapping way onto your bed.
CORRECT ORIENTATION AND SIZE
Often your objects come with a wrong orientation. To correct the orientation, right click on the object with your mouse to select it. Now you can change the rotation, object scale and position in the right tab. The position is not really needed, but if you need exact positioning it may be helpful. After entering the value you see the effect in the preview window. If your object vanishes from the screen, press “center” or “Auto position” to get them back. This happens often with rotations, because the object is rotated around it’s own origin. If an object hovers over the plate, hit “Drop object” to get it in contact with the build plate.
COPYING OBJECTS
You can make any number of copies from the selected objects. Click on “Copy object(s)” and enter the number of copies you want. Leave “Autoposition after adding objects” selected, if you don’t plan to position the objects on your own.
SELECTING AND MOVING OBJECTS
You can select one object by right clicking on it. If you press the ctrl-key while right clicking the selected object is added. ctrl-clicking a selected object removes it from the selection.
To move the selected objects, hold the alt-key down while left clicking and dragging the objects. When you select the top-view from the left toolbar, the movements will follow your mouse movements. If you don’t, the direction of the move is not the same of the mouse movement.
Depending on you configuration, the object may start to pulse or change it’s color, if it is not entirely on the print bed. This should help you identifying printing problems, even before you start slicing.
WHEN YOU ARE FINISHED
If you think you need this composition more then just once, you should save it as STL file. This will store all objects as one STL object. If you only want to slice this and then forget it, you can skip saving the objects.
Now it’s time to slice your objects. The “Slice with …” will start slicing with the currently selected slicer and settings. If you are not sure, switch to the slicing tab and check your settings. More on this in the next chapter.


