

Manual Control
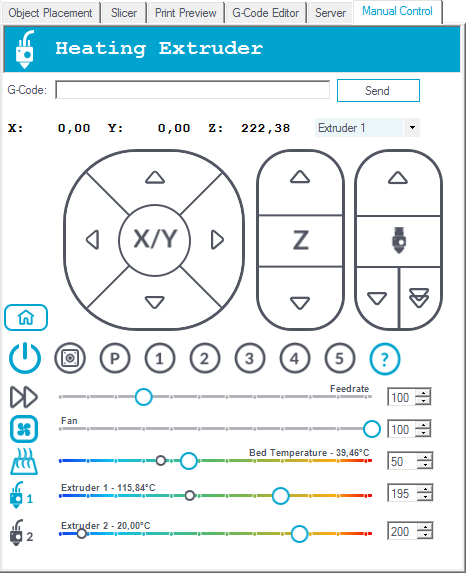
When you turn your printer on, you will often come to this tab. At the top you see the most important printer status, so you always know what is happening.

The next row allows it to send any g-code command you like. Enter it and press return or hit the send button. With the cursor up/down keys you can move through the history of manually send commands. If the “Easy Mode” is enabled, this field is not displayed.

The next block controls the positioning of the extruder. With the arrow keys you move the extruder in any direction. When you hover over the arrow, you will see a distance appear in mm, telling you how large the move will be. At the top you see the current extruder position. After the connection, they are red. Red means the host has no idea where the extruder really is. Press the home button to move the extruder to its defined position. After that the color turns black, telling you the position is known. From now on, the moves are only possible inside the printer cube defined in the printer settings. So if you are at x=180 and the cube is 200 mm wide, pressing 50 mm right will only move to 200 mm.
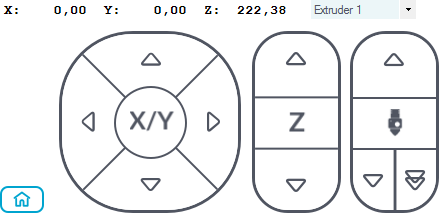
CAUTION: This protection works only for the arrow keys! Sending a G1 X300 would really send this to the printer. After that the host will show the coordinate in red again, assuming the move didn’t succeed.
Below the arrows you have the following buttons:
 Power: This turns the power supply on. This is not supported from all boards and needs a ATX power supply.
 Stop motor: Will disable the stepper motors.
 Park: Moves the extruder head into parking position defined in printer settings.
 Help bubbles: When you activate this, you will get help bubbles for all fields of the manual control.
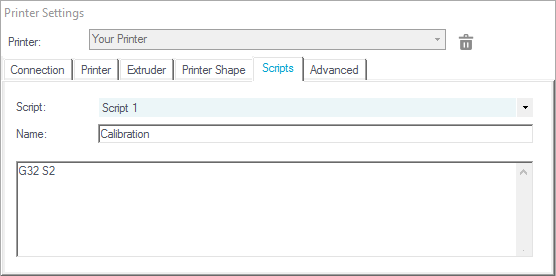
 With the buttons 1 – 5 you can send the predefines scripts 1 – 5 to the printer.
To modify these scripts just make a right click on the wanted number and the editor opens or click Printer Settings and then seltect Scripts. Every printer has it’s own set of scripts.
The “Speed multiply” slider allows it to change the printing/move speed in relation to the send feed rate. This function is tested with Repetier-Firmware and Marlin. Be careful if you increase the speed. If you haven’t defined the real limits in your firmware this can cause lost steps during print!

If the “Easy Mode” is disabled, you can change the flow rate, ie the amount of the extruded filament. A higher valie gives a fatter printed line.

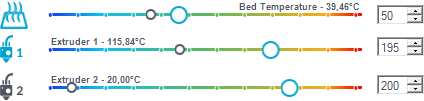
The extruder and print bed blocks allow it to change the temperature. The temperature can be set either on the right in the text field as well as by clicking on the temperature curve. If you change it in the text field, you need to press return or leave the field to set the value. By clicking the extruder or bed icon the extruder or the bed is deactivated or reactivated. In the right area of the temperature curve you see the last read temperature (you have enabled automatic temperature reading in printer settings?).
If you have a fan attached, you can change the fan speed and activate/deactivate it the same way as the temperatures.

In the last row you can set debug options for the printer if “Easy Mode” is disabled. Echo repeats the received lines, so you normally want it turned off. Info and error show messages at that debug level. These are interesting, so leave them on. The last one is something special, which works up to now only with Repetier-Firmware. In dry run mode, the firmware will ignore all commands to set temperature or extrude. That way you can send a file without using any filament. This is handy if your printer loses steps during print and you are doing some research on when and why. If you seem to have troubles with your extruder, check if you have that option enabled! The last button “OK” fakes a receiving ok from the printer. If your printer stalls, it may be simply because the firmware send an ok and only the o or k was received. In that case, hitting ok can restart the printing process.
