Slicing
Setup your slicer
Before you can use any slicer, you need to tell the host, where to find the needed executables and profiles. If you have used a recent windows installer, these values are already set. If you found a newer version on the internet and don’t feel like waiting for the next host release including them, you can change the settings to use the downloaded version.
SLIC3R
SKEINFORGE
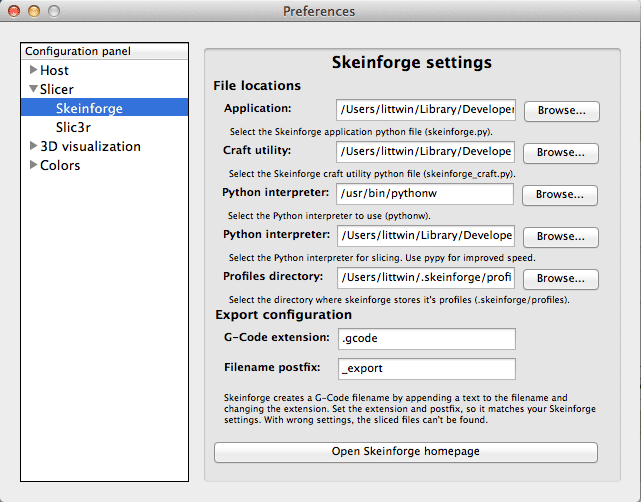
Select the slicer tab and press on “Setup” in the “Skeinforge” group. You will see a setup dialog like the one below.
For Skeinforge two programs are needed. The first is the application itself. It will show all profiles and also allows to slice objects. You will only use it to define your slicing profiles. The second one is the workhorse called skeinforge_craft.py. This is the program that does the slicing. If you use SFACT instead of Skeinforge, you need to define a working directory. This directory defines where the profiles are stored. The profiles directory is, where Skeinforge stores the defined slicing profiles. If you haven’t started Skeinforge before, this directory will not exist. Skeinforge creates this directory in your home directory with the name .skeinforge. You need to select the profiles subdirectory in it.
Skeinforge is written in python and requires python 2.7 to run. Select the python interpreter to use. For 3 to 4 times faster slicing times you should also install pypy and select the executable. If you leave it empty, the python interpreter is used instead.
The windows installer already installs and sets python and pypy.
Select slicer and profile
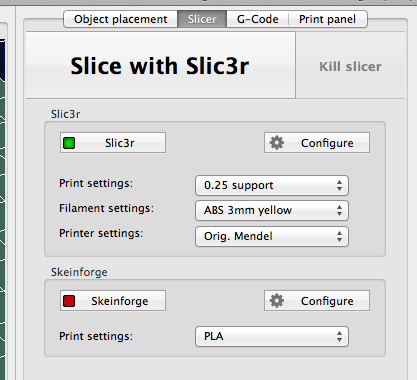
Now that we have setup the slicing software, we need some printing profiles. The slicer tab contains several drop down boxes, where you can select the profile to use when slicing. If they are empty, you need to create one with the slicing software. Click on the “Configure” button of the slicer and after some seconds the slicer should start. Define your profiles and make sure to save them. After you finished the program, the host will scan the directories for new profiles and show them.
HINT: Switching the active slicer also forces the host to reread the profiles.
Now activate the slicer you want to use and select the wanted slicing profile. This will be used until you change your selection.
Slice your objects
Now that your hard work is done, it’s time for your computer to work. Hit the “Slice with …” button and slicing should start. A small window showing the time will pop up. In your log you will see all output generated by the slicer. If you can’t see the log, click on “Show log” or increase the log panel size.
You should watch the output carefully. Sometimes the slicer has problems with your model. In most cases the problem is a non-manifold object description. The reason is the STL file you imported. STL is only a collection of triangles that should define the outside of the object. Unfortunately, these files often contain more then the outer shell when they are exported. One easy way to correct these models it with netfabb cloud service.
If you see an error or want to kill the slicing process, you can stop it any time by pressing the “Kill slicing process” button.
After the slicing is done, the g-code is loaded into the host and a preview of the print is rendered. More on this in the next chapter.


